Single sign-on
Apleno Server can delegate authentication to an external identity provider, so that users sign in with the account they already have in your organization. Two integrations are available:
- OIDC, for any standards-compliant provider (Okta, Keycloak, Google Workspace, Authentik, Entra ID, ...);
- Azure AD, a dedicated integration for Microsoft tenants.
If your provider supports OpenID Connect, use the OIDC integration: it is the most generic one and only needs an issuer URL. The Azure AD integration is kept for tenants already configured with it.
Warning
For single sign-on, your server must be accessible in HTTPS from Internet. See the HTTPS guide, or put Apleno Server behind a reverse proxy that terminates TLS.
How it works
Both integrations rely on the OAuth 2.0 protocol. Here is a summary of how a sign-in goes:
- The user clicks on the sign-in button on the Apleno Server login page;
- They are redirected to a login page hosted by the identity provider;
- They enter their credentials, their browser receives a unique token and is redirected back to Apleno Server;
- The browser sends this token to Apleno Server, which verifies the user's identity with another API call to the provider;
- The user is now correctly logged in.
Using OIDC
Creating the application on your provider
The exact wording differs between providers, but the steps are always the same. In your provider's admin console, create a new application (it may be called a client, or an app integration) with the following characteristics:
- Application type: web, also called a confidential client. Apleno Server keeps a client secret, so do not create a public or single-page client;
- Grant type / flow: authorization code;
- Redirect URI (sometimes callback URL, or sign-in redirect URI): the
complete Apleno Server address followed by
/auth/oidc/callback. For example, if your Apleno Server is reachable athttps://apleno.example.com, enterhttps://apleno.example.com/auth/oidc/callback.
Once the application is created, collect the three values Apleno Server needs: the client ID, the client secret, and the issuer URL of the provider.
The issuer URL is the base URL from which the provider publishes its
configuration, at <issuer>/.well-known/openid-configuration. Typical values
are:
| Provider | Issuer URL |
|---|---|
| Okta | https://<your-org>.okta.com |
| Keycloak | https://<host>/realms/<realm-name> |
| Google Workspace | https://accounts.google.com |
| Entra ID | https://login.microsoftonline.com/<tenant>/v2.0 |
Tip
Opening <issuer>/.well-known/openid-configuration in a browser is a quick
way to check the URL is right: it must return a JSON document. Use that same
URL from the server itself to confirm it can reach the provider, especially
if the server goes through an
outbound proxy.
Configuring Apleno Server
Edit the configuration (a .env file) within the Apleno
Server folder. The settings for OIDC authentication are:
| Environment variable | Description |
|---|---|
OIDC |
Set to true if you want OIDC authentication. |
OIDC_ISSUER |
Issuer URL of your OIDC provider, e.g. https://accounts.example.com. |
OIDC_CLIENT_ID |
The client ID of your OIDC application. |
OIDC_CLIENT_SECRET |
The client secret of your OIDC application. |
OIDC_DISPLAY_NAME |
Label shown on the sign-in button. Defaults to SSO. |
OIDC_GROUPS_CLAIM |
Claim name to read group membership from, for group-based access rules. Defaults to groups. |
OIDC_SCOPES |
Extra scopes to request from the provider, space-separated, on top of the defaults. |
Here is an example .env configuration:
# OIDC
OIDC=true
OIDC_ISSUER=https://accounts.example.com
OIDC_CLIENT_ID=ID_OF_YOUR_APPLICATION
OIDC_CLIENT_SECRET=SECRET_OF_YOUR_APPLICATION
OIDC_DISPLAY_NAME=Company SSO
OIDC_GROUPS_CLAIM=groups
OIDC_SCOPES=
OIDC_DISPLAY_NAME is what your users will read on the login page, so a name
they recognize (Company SSO, Okta, Google) is better than the default.
If you rely on group membership to grant access or roles, make sure the provider
actually sends the groups in the token: most of them require the matching scope
or a dedicated claim mapper on the application. Set OIDC_GROUPS_CLAIM to the
claim name your provider uses if it is not groups.
Do not forget to restart Apleno Server to apply the new settings.
Using Azure AD
Creating an Azure app
To configure Azure AD authentication, you first need to connect to Azure portal, then go in the Azure Active Directory section, then App registrations in the left menu.
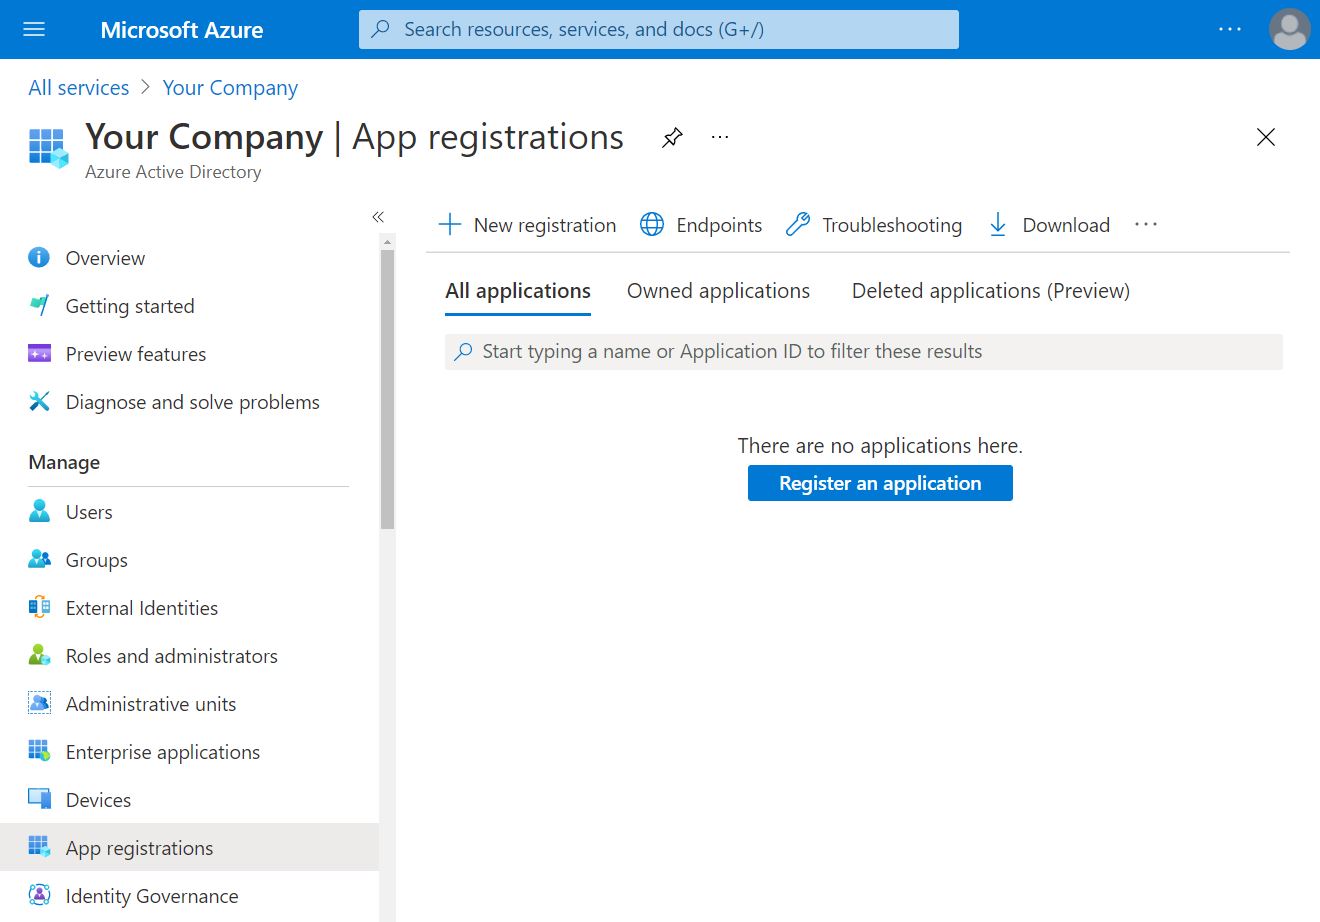
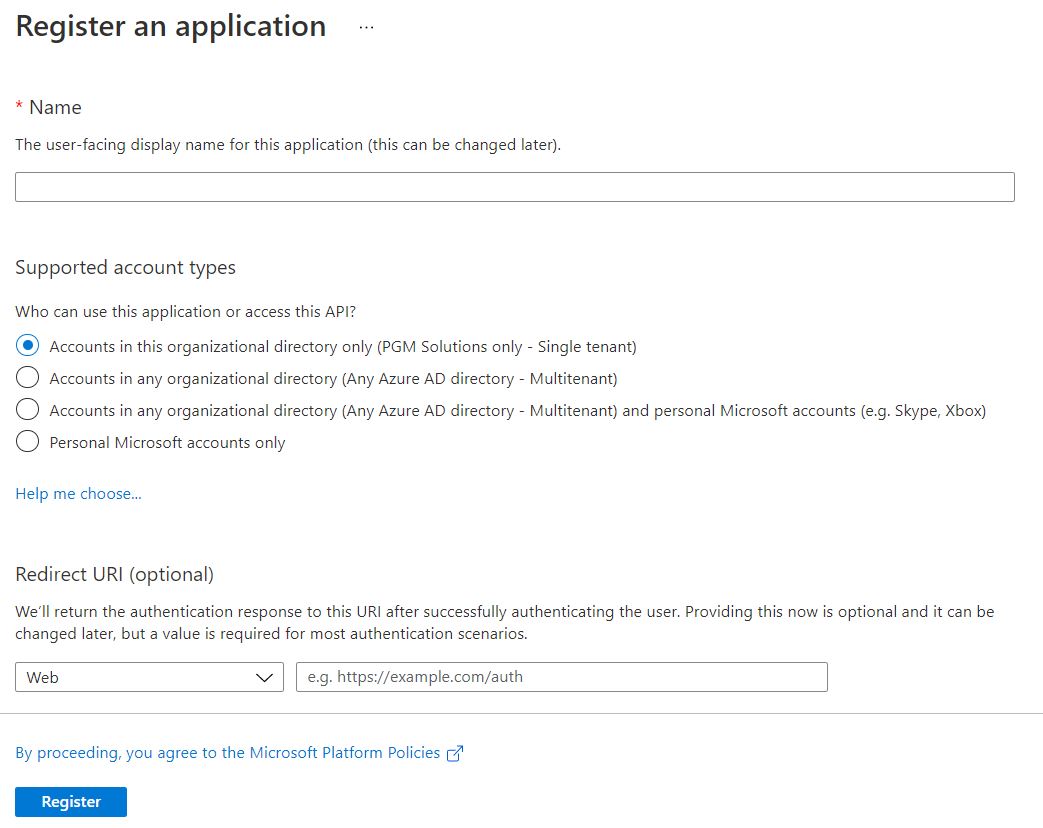
Click on the Register new application button, a new menu will pop where you have to fill a name. It is recommended to let the default Single tenant option selected for the account types.
Getting client ID and secret
You will then be redirected on the settings page of your new app. You will find
the ID of your app in the Overview section in the left menu, below the
Application (client) ID entry. This is the value that should go in the
AZURE_CLIENT_ID setting of the configuration file.
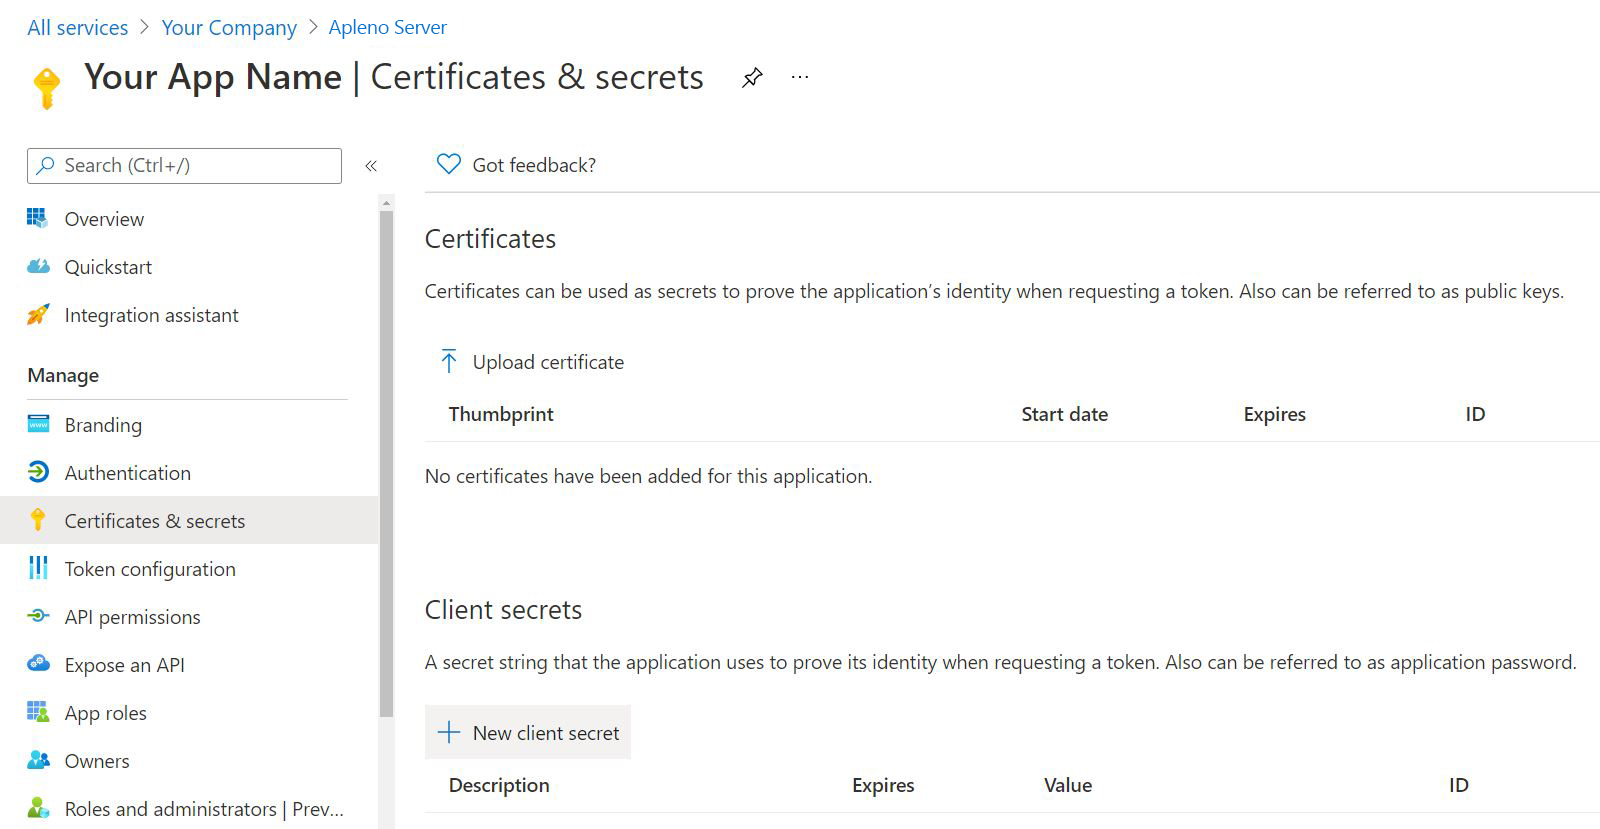
In the Certificates & secrets page from the left menu, press the New client
secret button to generate a new private key that should go in the
AZURE_CLIENT_SECRET setting of the configuration file.
Configure app
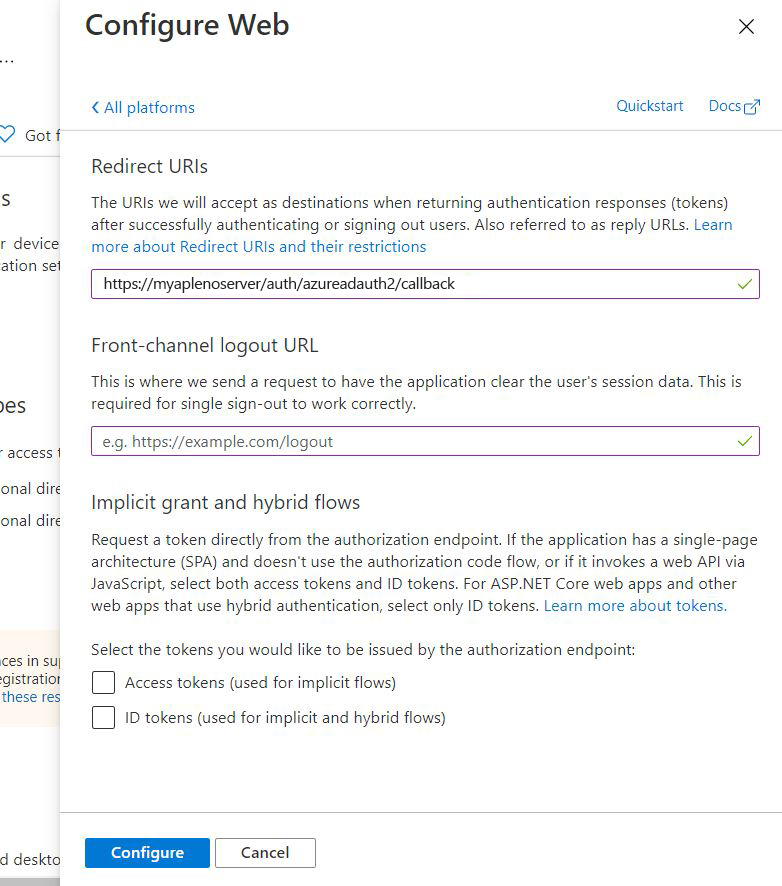
In the left menu, click on Authentication, then Add a platform in the new page. In the new right window, select Web.
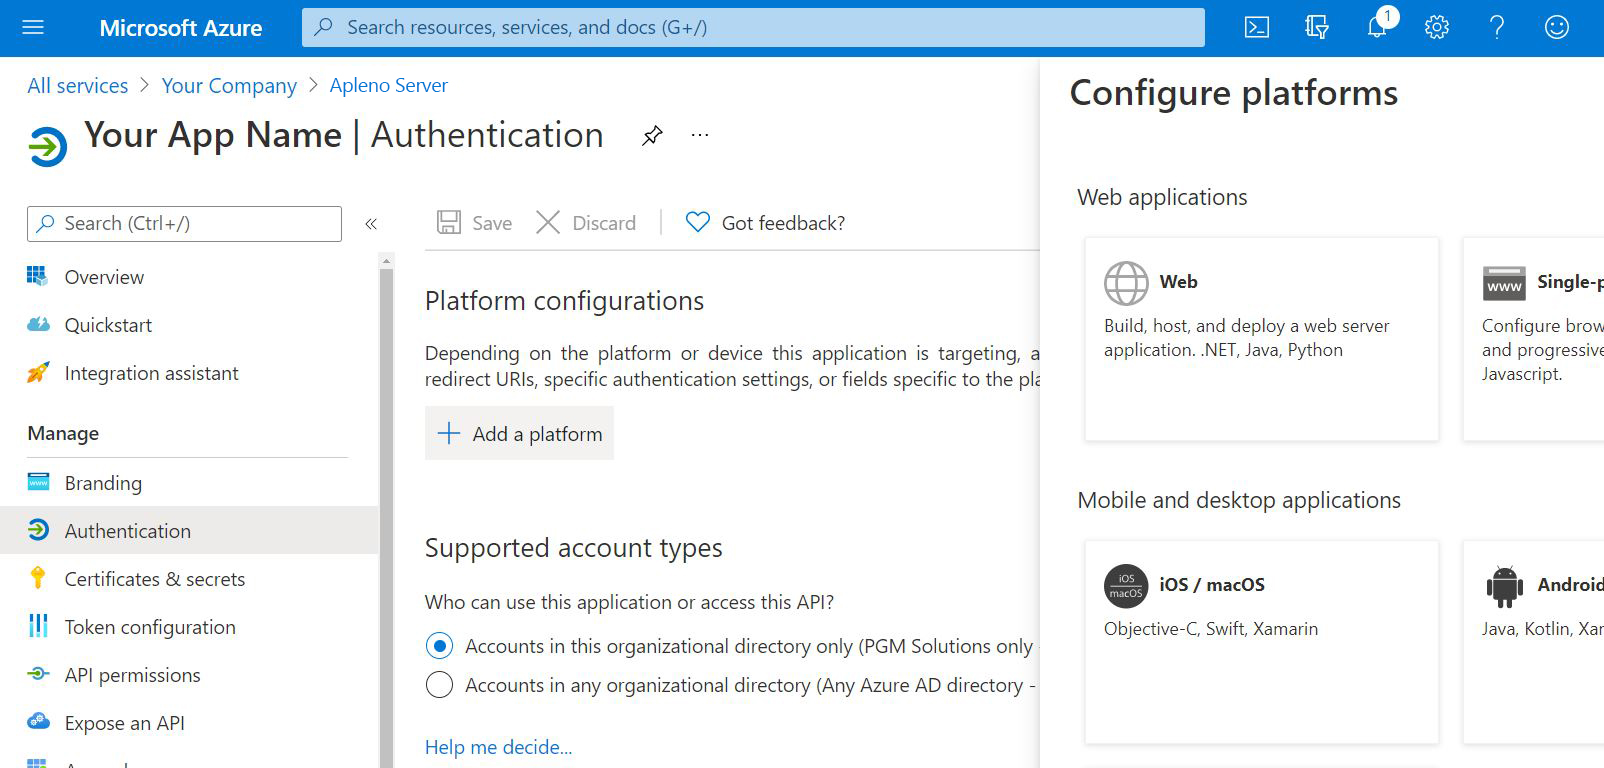
Finally, enter the complete Apleno Server address, followed by
/auth/azureoauth2/callback in the Redirect URIs. For example, if your Apleno
Server is installed on https://apleno.example.com, you will want to enter
https://apleno.example.com/auth/azureoauth2/callback. Click on Configure to
save your settings.
Configuring Apleno Server
Do not forget to change the configuration (a .env file)
within the Apleno Server folder. The settings for the Azure authentication are:
| Environment variable | Description |
|---|---|
AZURE |
Set to true if you want Azure AD authentication. |
AZURE_CLIENT_ID |
The client ID of your Azure AD App. |
AZURE_CLIENT_SECRET |
The secret key of your Azure AD App. |
AZURE_RESOURCE |
Resource of your Azure AD App. Can be empty. |
AZURE_TENANT |
The tenant name of your Azure AD App. Generally in the company.onmicrosoft.com format. |
AZURE_COMMON_ENDPOINT |
true if you want to use the generic, multi-domain Azure login page. Generally set to false. |
Here is an example .env configuration:
# Azure AD
AZURE=true
AZURE_CLIENT_ID=ID_OF_YOUR_APP
AZURE_CLIENT_SECRET=SECRET_OF_YOUR_APP
AZURE_RESOURCE=
AZURE_TENANT=company.onmicrosoft.com
AZURE_COMMON_ENDPOINT=false
Do not forget to restart Apleno Server to apply the new settings.
If nobody can sign in anymore
A wrong issuer URL, an expired client secret or a mistyped redirect URI can leave every user stuck on the login page. Local username and password sign-in can be re-enabled from the server itself, so you can log back in as an administrator and fix the settings:
See the command line page for the other administration commands.